Telegram Configuration
WHMCS Notify Extended
Telegram Configuration
 Telegram is probably one of the more difficult things to configure and get done just right when it comes to sending things out. Here's a very quick guide to getting this information
- To start with, you want to add this bot to your telegram service. You'll need it later
- Now, add BotFather to your telegram service . You'll need it later
- Now that you've added BotFather to your telegram, send him the following message /newbot Once you send that, follow the instructions , and remember the numbers he gives you (write them down)
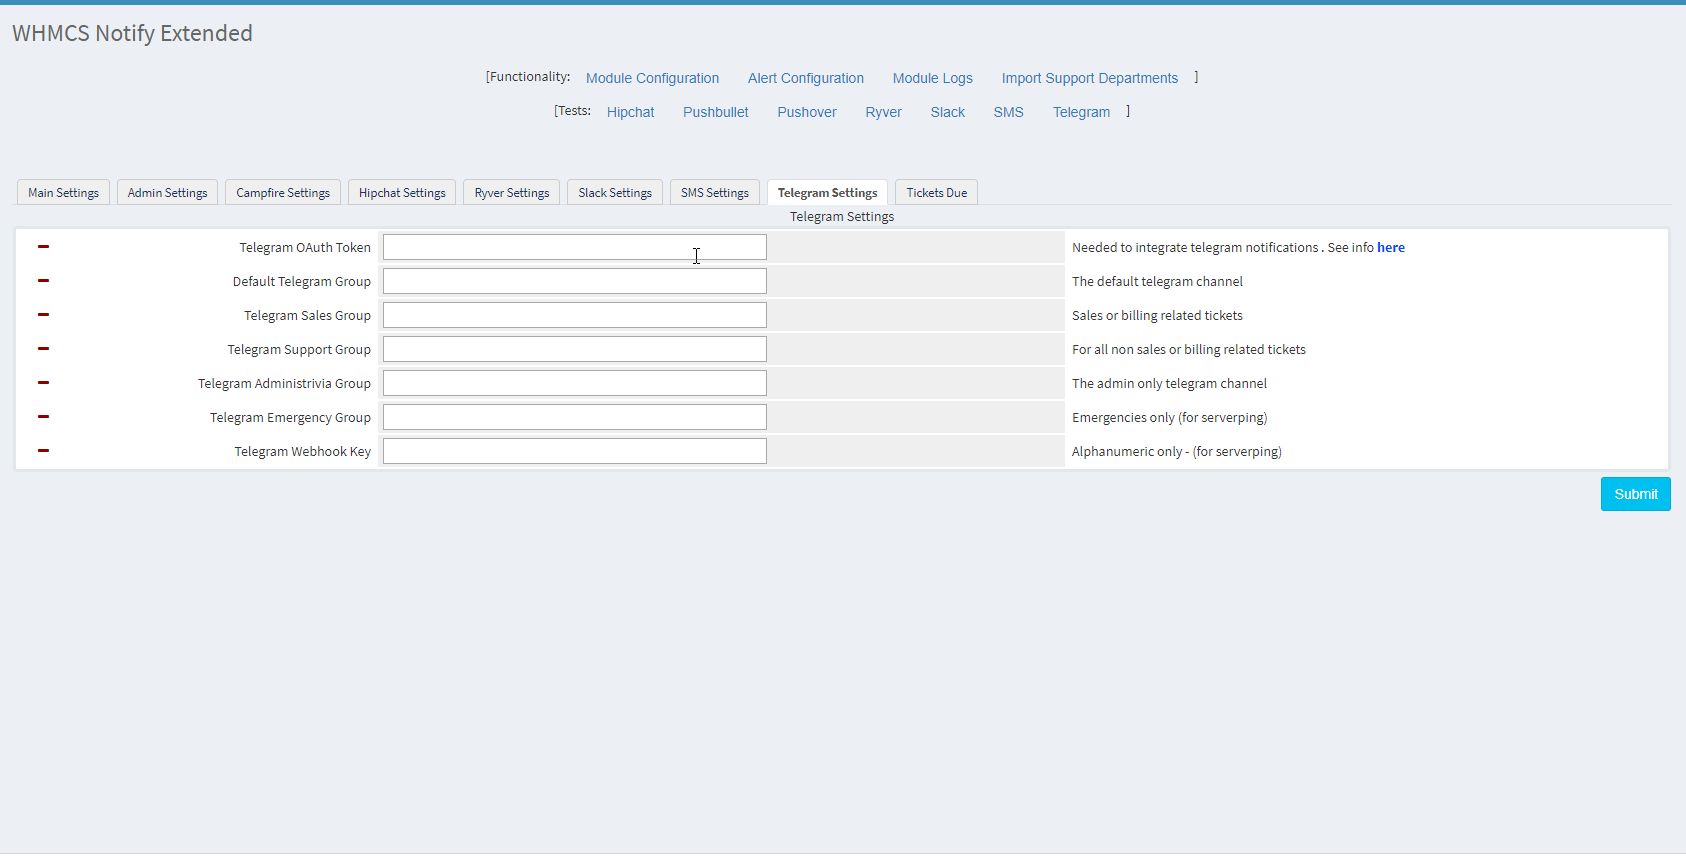
- In the Telegram tab of your configuration screen (on WHMCS Notify Extended), you'll want to enter the Telegram OAuth Token that you obtained from step 3 . this will look something like a long string of characters and numbers
- You need to setup individual groups (not channels, or chats). These will be your default, sales, emergency, etc channels
- Add ID Bot to each group (this will be the user you added in step 1)
- Once the ID Bot is in each group, send it a message, exactly as follows from inside of the group /my_id@get_id_bot inside of the room. This will return some information ----------------------------- Hello user Your Chat ID = positiveinteger User Name = yourusername Your group Chat ID : negativeinteger Title : Group Name ----------------------------- You need to plug the group chat ID into the telegram configuration page for that specific chat room Your Chat ID is available and can be added to your configuration list (see admin setup -> telegram ID)
- Repeat step 3 for each group, inside of each group
Updated on February 18, 2018 5:51 AM
Did you find this useful?
0 people have found this useful.
Search
Projects
WHMCS Cron Notifications Extended
4
WHMCS Notify Extended
6
WHMCS Support Extended
4
WHMCS User and IP Control
3
WHMCS User Email Validation
4
Tags
Added 3
Admin 2
Alert 3
Alerts 1
Amount 1
Another 1
Appropriate 1
Based 2
Better 1
Bulksms 1
Campfire 1
Cannot 1
Cases 1
Changelog 1
Chat 2
Check 1
Click 2
Client 2
Clients 1
Cron 1
Crons 1
Default 3
Department 1
Didn 1
Directly 1
Directory 1
Disable 1
Doesn 1
Download 2
Each 4
Email 1
Enable 1
Enabled 2
English 1
Expanded 1
Extended 4
Fixes 1
Forwarder 1
Functionality 1
Group 1
Heart 1
Help 1
Here 4
Huge 1
Information 1
Initial 1
Install 1
Invalid 1
Just 1
Lang 1
License 2
Like 4
List 1
Logging 1
Long 1
Make 1
Mass 1
Message 2
Minutes 1
Misc 3
Moved 1
Much 1
Name 1
Need 3
Needed 1
Nexmo 1
Nickname 1
Notes 1
Notification 3
Notifications 3
Notify 3
Obtain 2
Official 1
Overrides 1
Password 1
Payment 1
Please 1
Portion 1
Product 2
Provided 1
Pushalot 1
Pushbullet 2
Pushover 2
Quick 1
Receiving 1
Release 1
Reminder 1
Rename 1
Room 2
Ryver 2
Screen 1
Select 1
Send 1
Sent 1
Services 1
Setup 2
Should 1
Showing 1
Simply 1
Slack 1
Some 1
Something 1
Soul 1
Specific 2
Stable 1
Staff 1
Support 3
Sure 1
System 1
Team 1
Telegram 4
Testing 1
Their 1
Then 3
There 1
These 1
They 1
Through 2
Token 2
Troubleshooting 1
Twilio 1
Update 1
Updates 1
Upload 1
Used 1
User 2
Version 4
Want 3
Webhook 1
Were 1
What 2
When 1
Where 1